


Android users do not wait around for a slow app to recover. A crash on launch, a frozen scroll, a button that just does not respond, and the app gets uninstalled within minutes.
That is what makes Android app test automation such a core part of shipping, not a checklist item before a release meeting.
It is the process that decides whether your app holds up once it leaves Android Studio and lands on a five year old Redmi phone running a custom OEM skin nobody on your team owns.
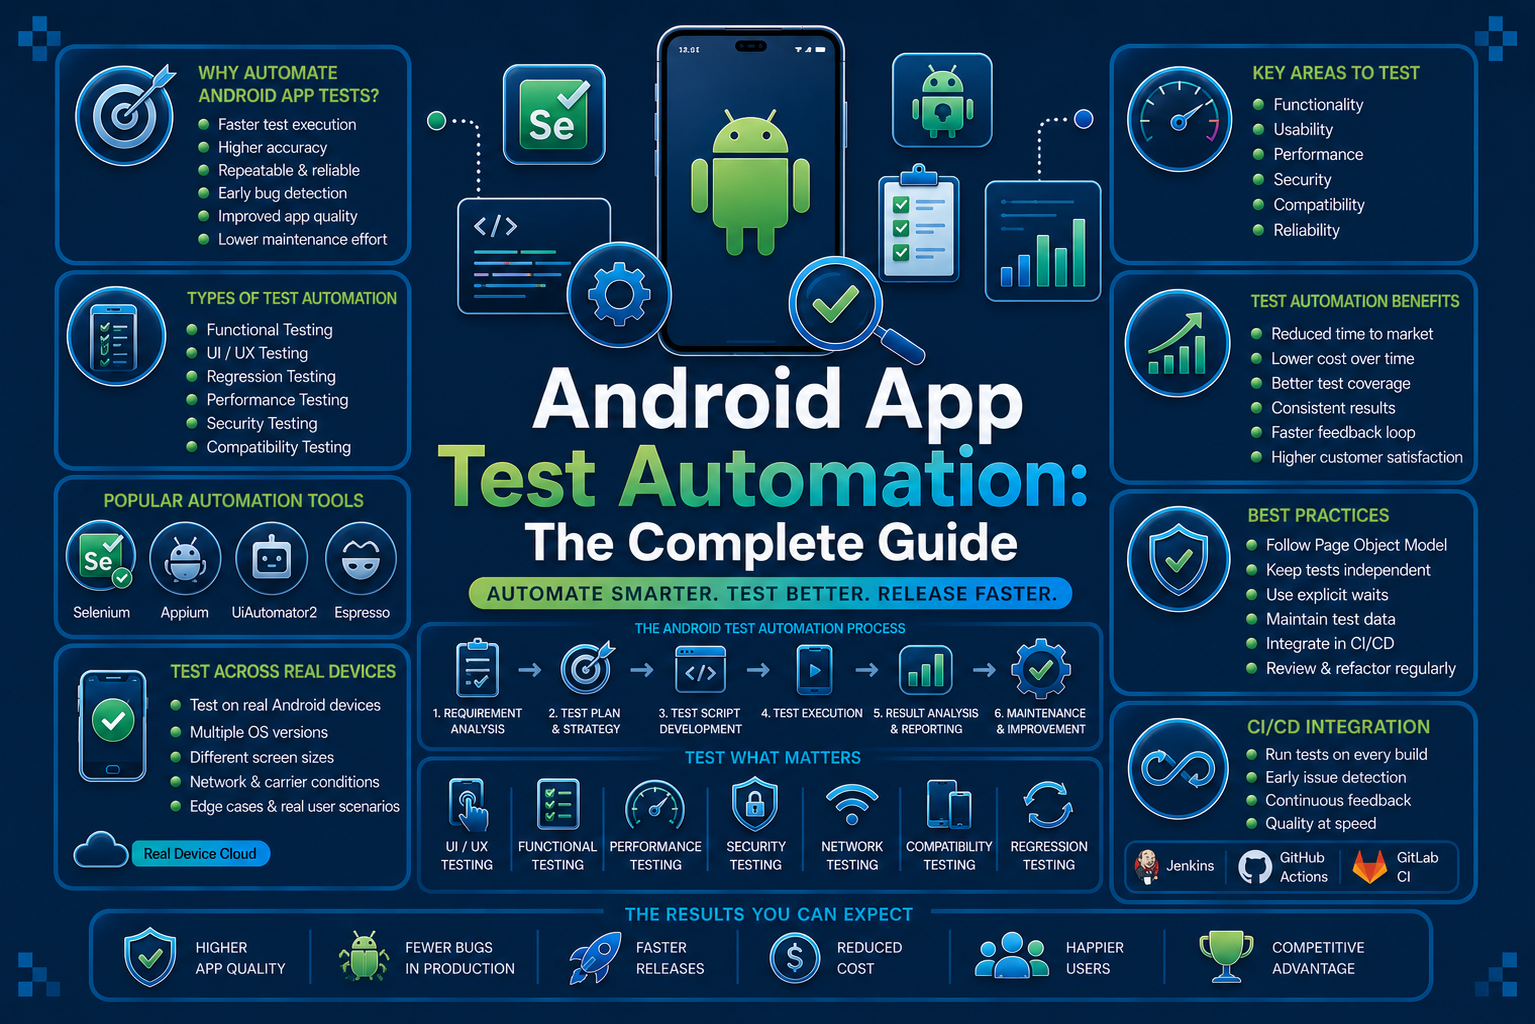
This guide goes deep into Android app test automation, covering the testing types, the underlying frameworks like Espresso and UI Automator, real code examples, tooling, and the checks that actually catch problems before device fragmentation or your users do.
What Is Android App Test Automation
Android app test automation is the process of verifying that an Android app works the way it is supposed to, at the code level, the interface level, and the system level, using scripts instead of manual clicks.
That includes unit level correctness of your Kotlin or Java logic, UI behavior validated through automated interaction, performance profiling under real memory and battery constraints, and compatibility across the sprawling range of Android devices actually in use.
Why Android Test Automation Is Its Own Discipline
Android looks open and flexible compared to iOS. It is. But that flexibility is exactly what makes testing harder, not easier.
A few things make Android testing technically distinct:
- Thousands of device models are active at once, spanning Samsung, Xiaomi, OnePlus, Pixel, and dozens of smaller OEMs, each with its own skin layered on top of stock Android.
- OS version adoption is slow and fragmented. Unlike iOS, a meaningful share of users can still be sitting two or three major Android versions behind.
- Google Play’s review process is looser than Apple’s at submission time, but Play Vitals enforcement after launch can throttle visibility for apps with high crash rates or ANRs.
- OEM customizations affect background process handling, notification behavior, and even how aggressively an app gets killed to save battery, which standard emulators do not always replicate.
None of this means Android testing has to be chaotic. It just means the strategy has to be built around real fragmentation, not a generic mobile checklist copied from an iOS process.
What Good Android Test Automation Actually Covers
A comprehensive Android testing strategy extends far beyond verifying that an app opens successfully. It includes multiple layers of testing, with each layer targeting a specific class of bugs:
- Unit level logic errors in isolated functions and classes
- Integration issues between modules, repositories, and APIs
- UI and interaction bugs surfaced through simulated gestures
- Performance regressions in memory, CPU, and battery usage
- Compatibility gaps across OEMs, screen sizes, and OS versions
- Security gaps in data storage, permissions, and network calls
- Accessibility issues that break the app for screen reader users
Skipping even one of these layers is usually where things go wrong. A feature can pass every functional test and still crash in production because it was only ever tested on a Pixel emulator running the latest OS.
Types Of Android Tests You Can Automate
Android testing includes several distinct testing types, each supported by its own frameworks and tools. Rather than relying on a single approach, mature QA teams combine multiple testing layers to achieve broader coverage.
1. Unit Testing With JUnit
Unit testing checks individual pieces of code, like a single function or class, in isolation, without touching the UI or a device. JUnit, paired with Robolectric for Android specific classes, is the standard here.
A basic JUnit test validating a login form’s email check looks roughly like this:
import org.junit.Test
import org.junit.Assert.assertTrue
import org.junit.Assert.assertFalse

class LoginValidatorTest {

    private val validator = LoginValidator()

    @Test
    fun validEmailPassesValidation() {
        assertTrue(validator.isValidEmail("user@example.com"))
    }

    @Test
    fun invalidEmailFailsValidation() {
        assertFalse(validator.isValidEmail("not-an-email"))
    }
}
This kind of test runs on the JVM, does not need a device or emulator, and gives immediate feedback the moment logic breaks.
It is usually the first layer developers write, since it catches errors early, before they turn into harder to trace bugs further down the pipeline.
2. UI And Instrumented Testing With Espresso
Espresso, Google’s official Android UI testing framework, drives the app the way a real user would, tapping buttons, entering text, and asserting what appears on screen. It runs on a real device or emulator, not in isolation.
A simple Espresso test for a login flow:
@RunWith(AndroidJUnit4::class)
class LoginFlowUITest {

    @get:Rule
    val activityRule = ActivityScenarioRule(LoginActivity::class.java)

    @Test
    fun loginSuccess() {
        onView(withId(R.id.emailField))
            .perform(typeText("user@example.com"), closeSoftKeyboard())

        onView(withId(R.id.passwordField))
            .perform(typeText("Password123"), closeSoftKeyboard())

        onView(withId(R.id.loginButton)).perform(click())

        onView(withId(R.id.welcomeMessage))
            .check(matches(isDisplayed()))
    }
}
Espresso automatically synchronizes with the app’s UI thread, which is why it does not need explicit sleep calls the way some other frameworks do.
That built in synchronization is a real advantage. It waits for the UI to settle before asserting, which cuts down on the flakiness that plagues UI tests on other platforms.
3. Cross-App Testing With UI Automator
Espresso is limited to testing within your own app’s process. UI Automator fills that gap by interacting with system UI, other apps, and device level dialogs.
This matters for anything touching permissions prompts, notifications, the share sheet, or split screen behavior, since Espresso simply cannot reach outside your app to verify those interactions.
Teams generating Baseline Profiles for app startup performance also rely on UI Automator, since its predicate based element finding produces more stable, deterministic test runs.
4. Integration Testing
Integration testing checks how two or more components work together, such as a ViewModel pulling data from a repository, or a repository correctly caching a network response.
These tests sit between unit tests and full visual UI tests. They run faster than instrumented tests but catch issues that isolated unit tests miss entirely.
5. Functional Testing
Functional testing verifies that app features work as intended from the user’s perspective. Teams often combine manual exploratory testing with Espresso automation to validate repeatable user flows.
Think login, search, checkout, and form submissions. If a user taps a button, something specific should happen, and functional testing checks that it does, consistently, across builds.
6. Performance Testing With Android Profiler And Macrobenchmark
Performance testing looks at how the app behaves under stress, and Android Studio ships with tools that make this measurable instead of guesswork.
A few tools worth knowing:
| Tool | What It Measures |
|---|---|
| Android Profiler | Live CPU, memory, network, and energy usage during a session |
| Macrobenchmark | Startup time, scroll jank, and Baseline Profile validation |
| Memory Profiler | Object allocation and leaked references over time |
| Battery Historian | Battery drain attributed to wakelocks and background work |
| Systrace / Perfetto | Frame level rendering and system trace analysis |
Running Memory Profiler during an extended session is one of the fastest ways to catch leaked Activity or Fragment references, which is a common source of memory bloat when listeners are not properly unregistered.
7. Compatibility And Device Fragmentation Testing
This checks whether the app works consistently across different OEMs, screen sizes, and Android versions, including differences in how manufacturers handle background process limits.
Most teams support the current Android version plus the previous two or three major versions, since that combination typically covers the bulk of active users for most apps.
8. Security Testing
Security testing verifies that user data, authentication mechanisms, and sensitive information are protected against common Android security vulnerabilities.
This includes validating runtime permission handling, secure data storage using Android Keystore or EncryptedSharedPreferences, encrypted network communication, and certificate pinning for APIs that transmit sensitive data.
Android applications also rely heavily on Intent-based communication, making exported components, deep links, and improperly configured Intents common attack vectors.
Security testing helps identify and address these risks before they can be exploited.
9. Accessibility Testing
Accessibility testing checks whether the app works with TalkBack, supports font scaling without breaking layouts, and maintains a logical focus order for screen reader navigation.
Android Studio’s Accessibility Scanner can audit a running app for missing content descriptions, low contrast ratios, and touch targets that are technically present but too small to tap reliably.
Manual Testing Vs Automated Testing On Android
This is one of the most common questions teams face as their testing strategy matures. The answer is straightforward: both manual and automated testing are essential because each serves a different purpose.
When Manual Testing Makes Sense
Manual testing is where a real person interacts with the app the way an actual user would. It is particularly useful for:
- Exploratory testing, where you are looking for issues nobody thought to write a test case for
- Usability checks that need human judgment, like whether a transition actually feels smooth on a mid-range device
- Early stage testing on features that are still changing shape rapidly
The tradeoff is that manual testing does not scale well. It is slower, harder to repeat consistently across builds, and gets expensive as your regression surface grows.
When Automated Testing Makes Sense
Android test automation shines for repetitive, high volume work. Regression testing is the clearest example. Every time you ship a new build, you likely need to re-verify dozens of flows that already worked before.
Automated tests, built with Espresso or Appium and run through Gradle or adb shell am instrument from the command line, can execute these checks consistently and catch regressions before they reach QA.
A common flaky test cause worth knowing: dynamic view IDs generated by Jetpack Compose when semantics are not explicitly assigned. This silently breaks selectors that worked fine the day before.
Always assign explicit testTag modifiers in Compose or stable resource IDs in XML layouts rather than relying on generated defaults.
Most teams that scale their Android testing eventually plug this automation into CI/CD, running tests automatically on every pull request through GitHub Actions, Bitrise, or Jenkins instead of waiting for someone to trigger them manually.
This is where a platform like Panto AI fits in for teams that want AI assisted test generation and PR level checks catching issues at the point they are introduced, rather than after a full build has already shipped to QA.
Real Devices Vs Emulators
Emulators are useful early in development. They are fast, free, and good enough for basic UI and layout checks while you are iterating quickly, and most CI pipelines run comfortably on them.
But emulators cannot fully replicate real OEM behavior, thermal throttling, actual GPS, cellular network switching, or true battery drain.
Some bugs, especially ones tied to a specific manufacturer’s Android skin, only surface on physical hardware.
A Practical Rule Of Thumb
- Use emulators for quick iteration during active development and for most unit and UI test runs in CI
- Move to real devices once features stabilize, especially anything touching camera, sensors, or background processing
- Always test on real devices before a major release, covering at least two or three different OEMs
If maintaining a large in-house device lab is not practical, cloud-based real device testing platforms provide a scalable alternative.
They give teams access to a wide range of Android devices, OEM skins, and OS versions without the cost and complexity of managing physical hardware.
Essential Android Test Automation Tools
You do not need dozens of tools to test an Android app well, but most teams end up piecing together something from each of these categories to cover everything from code level checks to real device coverage.
- A unit testing framework to check individual functions and classes in isolation as you write code
- A UI automation framework to simulate real user gestures like taps, swipes, and text entry across screens
- A performance profiling tool to catch memory leaks, CPU spikes, and battery drain before they reach users
- A beta distribution platform to get builds in front of real testers and collect crash reports and feedback
- A device lab or cloud device platform for testing across different OEMs, screen sizes, and OS versions
- A network debugging tool to inspect API calls, response times, and how the app behaves on poor connections
- A CI/CD pipeline to run the full test suite automatically on every commit or pull request instead of manually
- A crash and bug tracking tool to catch and log issues that slip through testing after release
That is a lot of separate tools to set up, license, and keep in sync with each other, and most teams end up spending nearly as much time managing the testing stack as they do actually testing.
How AI can assist in Android App Test Automation
Instead of managing separate tools for test automation, device testing, and CI validation, teams can streamline these workflows within a single platform.
Panto AI combines AI-powered test generation, testing across more than 150 real Android and iOS devices, and pull request-level validation into one workflow.
By validating code changes as they are submitted, it helps teams identify issues earlier in the development cycle instead of discovering them after passing through multiple disconnected tools.
For engineering teams looking to reduce the overhead of maintaining a complex testing stack, consolidating these capabilities into a single platform like Panto AI can simplify workflows, improve visibility, and save valuable engineering time with every release.
Android App Testing Checklist Before Release
Before you ship a major release, it helps to run through a focused technical checklist rather than relying on memory.
Code And Logic
- Unit test coverage exists for critical business logic, not just UI
- No unhandled null pointer risks left in code paths handling user or network input
- Memory leaks checked using Android Profiler on core user flows
Functionality
- All core user flows complete without errors on both emulator and device
- Forms validate input correctly, including edge cases and empty states
- Payment and authentication flows work end to end, including failure states
UI, UX, And Accessibility
- Layouts hold up across at least three screen sizes using ConstraintLayout, not fixed dimensions
- TalkBack reads all interactive elements with meaningful content descriptions
- Font scaling does not break or clip text at larger accessibility sizes
Performance
- App loads within an acceptable time on older, lower spec supported devices
- No unexpected memory growth during extended sessions in the Profiler
- Battery impact stays within reasonable limits according to Battery Historian
Compatibility
- Tested on the current Android version and at least two prior major versions
- Tested across at least two or three different OEM skins, not just stock Android
- Tested on tablets and foldables if your app supports larger screen classes
Security And Compliance
- Sensitive data is stored using EncryptedSharedPreferences or the Keystore, not plain files
- Exported components and Intent filters are scoped correctly, not left wide open
- Runtime permission flows handle both granted and denied states gracefully
- App metadata and behavior comply with Google Play’s current policies
Running through this before every major release catches the majority of issues that would otherwise surface only after launch, when they are far more expensive to fix.
Where Android Test Automation Is Headed
A few shifts are becoming hard to ignore across Android QA teams right now.
Testing is moving earlier into the development cycle rather than happening as a final gate before release.
Teams are catching issues at the pull request stage instead of waiting for a full QA pass, which shortens the feedback loop considerably and reduces the cost of fixing a bug found late.
AI assisted testing is also gaining ground, particularly for identifying test gaps, reducing flaky results caused by dynamic view IDs, and helping teams write Espresso and UI Automator coverage faster.
Real device testing is becoming the default for final validation too, even as emulators remain useful for early iteration and most CI runs.
None of this replaces the fundamentals though. Solid unit test coverage, accurate Espresso flows, careful Profiler usage, and genuine security hygiene still form the foundation.
The tools around them are just getting faster and catching problems sooner in the pipeline.
Conclusion
Android app test automation is not about running every possible test on every possible device.
It is about layering unit, UI, performance, and security testing correctly, backing it with the right frameworks, and catching issues before device fragmentation or your users do.
Layer in automation where it saves your team the most time. Get that balance right, and your app has a far better shot at holding up in the real world, not just in the emulator.