

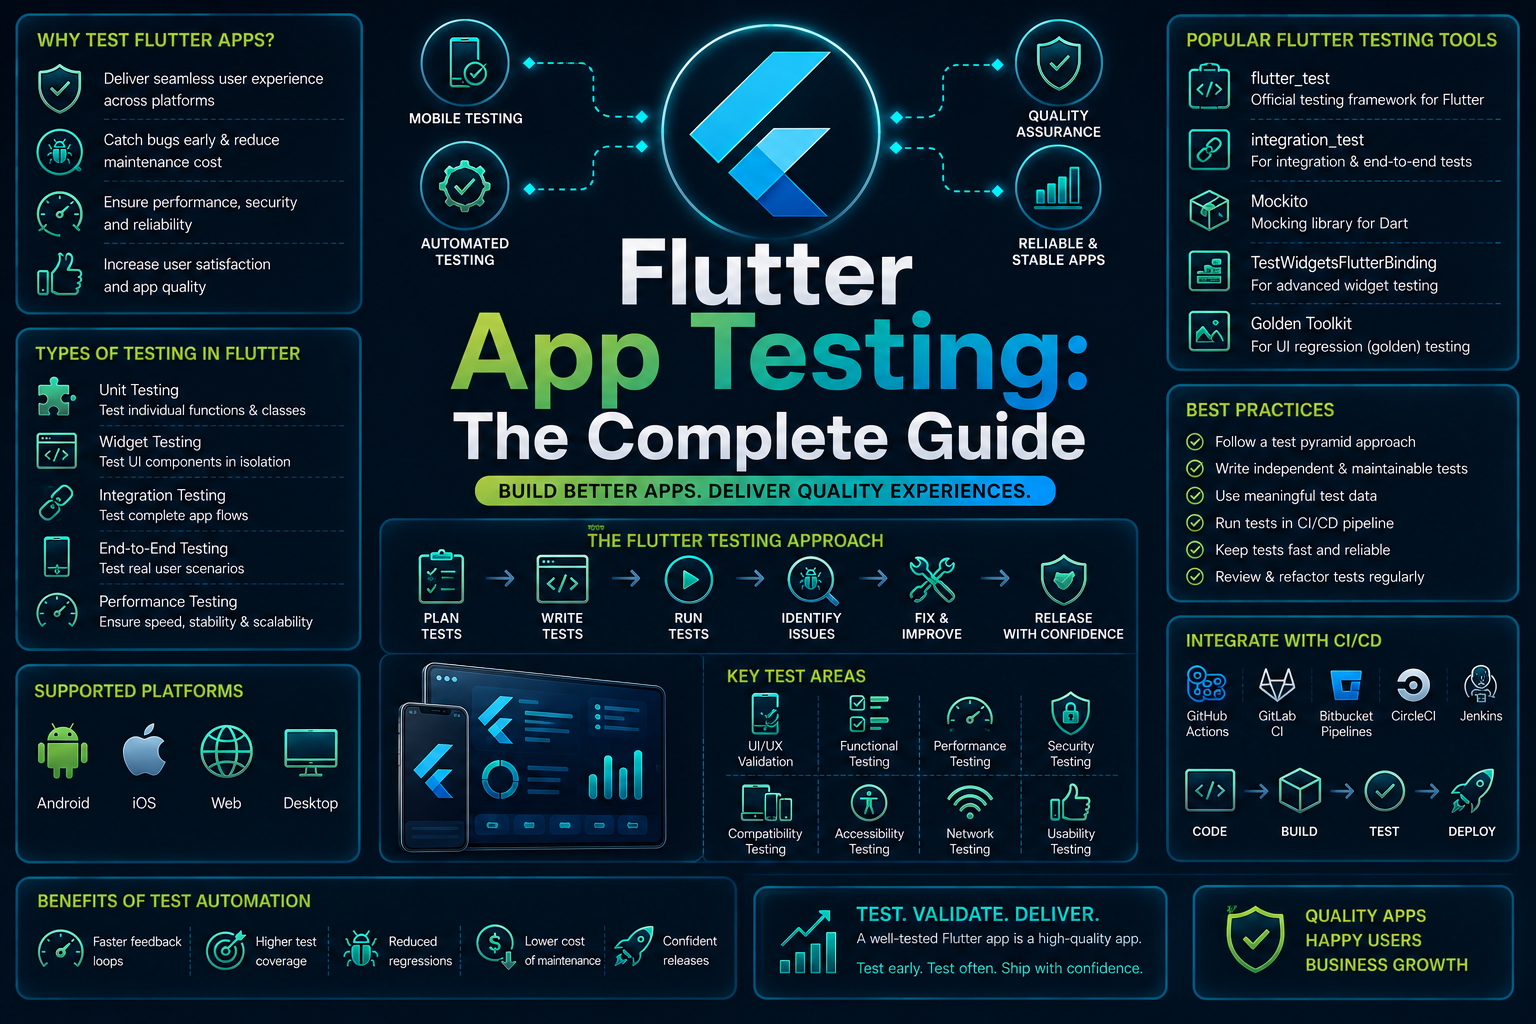

Flutter renders its entire interface with its own graphics engine instead of native platform components. That is what gives Flutter apps their pixel-perfect consistency across Android and iOS.
It is also what makes Flutter app testing genuinely harder than testing a native app. Most automation tools look at a Flutter screen and see one giant canvas, not buttons, fields, or lists.
This guide covers everything you need to actually test a Flutter app in 2026: the three official test types, where Flutter’s own tooling stops working, and how to build a testing strategy that holds up as your app grows.
Why Flutter App Testing Is Different From Native Testing
Native Android and iOS testing tools rely on reading the platform’s real view hierarchy. A test can see a UIButton or a native TextView directly because the operating system exposes it.
Flutter does not work that way. Its rendering engine, known as Impeller, draws every pixel itself and bypasses the native view hierarchy entirely.
To a tool built for native automation, a Flutter screen often looks like a single opaque view with nothing tappable inside it, even though the user sees buttons, text fields, and lists perfectly clearly.
This is the opposite of how native mobile app testing normally works, where the operating system exposes every interactive element directly.
The Custom Rendering Engine Problem
This architectural choice is exactly what gives Flutter apps consistent behavior across platforms. The tradeoff shows up specifically in automated testing.
Selector-based tools that work reliably on native apps struggle here.
Since they depend on reading widget keys, text matchers, or accessibility labels that Flutter’s rendering engine does not expose the same way native components do.
That is not a bug in any specific tool. It is a structural side effect of how Flutter chooses to render.
The Three Official Flutter Test Types
Flutter’s own documentation defines three official categories of tests, each supported by built-in SDK packages.
| Test Type | What It Verifies | Package | Runs On |
|---|---|---|---|
| Unit test | A single function, method, or class in isolation | flutter_test | No device needed |
| Widget test | How a widget renders and responds to interaction | flutter_test | Simulated environment |
| Integration test | Full user flows across the real app | integration_test | Real device or emulator |
Each layer trades speed for realism. Unit tests run in milliseconds but tell you nothing about the UI. Integration tests are closest to what a real user experiences but run slower and need an actual device.
What integration_test Can And Cannot Do
The integration_test package gives tests direct access to Flutter’s widget tree, which works well as long as everything the test touches stays inside Flutter itself.
The moment a flow needs something outside Flutter’s own runtime, a permission dialog, a biometric prompt, a push notification, or a WebView, integration_test has no way to reach it.
This gap is not a minor edge case.
Login flows, payment confirmations, and onboarding screens almost always touch at least one native system element, the same category of flow that Android app test automation has to account for on the native side.
How To Test Flutter Apps Step By Step
Building a real testing strategy means understanding what each layer is actually good for, not just running whichever test type is fastest to write.
Flutter Unit Testing
Unit tests check a single piece of business logic completely isolated from the UI. No widgets render and no device is involved.
A typical unit test looks something like this.
test('calculates cart total correctly', () {
  final cart = Cart();
  cart.addItem(Item(price: 10));
  cart.addItem(Item(price: 15));
  expect(cart.total, 25);
});
These tests run in milliseconds, which makes them cheap to run on every single commit.
What To Unit Test In A Flutter App
Focus unit tests on logic that has clear inputs and outputs, not on anything involving the widget tree.
- Business logic like pricing calculations or validation rules
- Data models and serialization or deserialization
- State management logic in isolation from the UI
- Utility functions and formatters
Flutter Widget Testing
Widget tests verify that a specific widget renders correctly and responds to interaction, inside a simulated environment that provides real widget rendering without the overhead of a full device.
testWidgets('tapping button increments counter', (tester) async {
  await tester.pumpWidget(MyCounterApp());
  await tester.tap(find.byIcon(Icons.add));
  await tester.pump();
  expect(find.text('1'), findsOneWidget);
});
Widget tests sit in the middle of the testing pyramid. They are slower than unit tests but far faster than running a full integration test on a real device.
Common Widget Testing Mistakes
- Testing implementation details instead of what the user actually sees
- Forgetting to call
pump()after an interaction, so the widget never rebuilds - Writing widget tests for logic that belongs in a unit test instead
- Relying on widget position instead of stable keys or semantics
Finding Widgets The Right Way
Flutter’s find API offers several ways to locate a widget inside a test, and picking the wrong one is a common source of fragile tests.
| Finder | Matches On | Stability |
|---|---|---|
| find.byKey | A unique widget key you assign yourself | Most stable, recommended for interactive elements |
| find.text | Exact visible text | Breaks if copy changes |
| find.byType | Widget class type | Fragile when multiple instances exist |
| find.byIcon | A specific icon | Stable for icon-only buttons |
Assigning explicit keys to interactive widgets during development is one of the simplest ways to keep both widget and integration tests stable over time.
Mocking Dependencies With Mockito
Real Flutter apps depend on network calls, databases, and platform services that should never run inside a unit or widget test.
Mockito is the standard library for replacing those dependencies with controlled fakes.
class MockApiClient extends Mock implements ApiClient {}

test('handles failed login gracefully', () async {
  final mockClient = MockApiClient();
  when(mockClient.login(any, any)).thenThrow(AuthException());
  final result = await AuthService(mockClient).attemptLogin('user', 'pass');
  expect(result.success, false);
});
Mocking keeps tests fast and deterministic, since the test controls exactly what the dependency returns instead of depending on a real network call succeeding.
Measuring Flutter Test Coverage
Flutter’s built-in test runner can generate coverage data directly, which is useful for spotting logic that has no tests at all rather than chasing an arbitrary coverage percentage.
flutter test --coverage
genhtml coverage/lcov.info -o coverage/html
Coverage percentage alone is a weak signal on its own. A file can show 90% coverage while its most important edge cases remain completely untested.
Use coverage reports to find untested files first, then read the actual test cases inside well-covered files before trusting the number.
Flutter Integration Testing
Integration tests run the complete app, or a major feature slice, on a real device or emulator, automating full user journeys across multiple screens.
This is the layer closest to what a real user actually experiences, since it exercises navigation, state persistence, and rendering together rather than in isolation.
testWidgets('user can complete checkout flow', (tester) async {
  await tester.pumpWidget(MyApp());
  await tester.tap(find.text('Add to Cart'));
  await tester.pumpAndSettle();
  await tester.tap(find.text('Checkout'));
  await tester.pumpAndSettle();
  expect(find.text('Order Confirmed'), findsOneWidget);
});
Integration tests are slower and more expensive to maintain than unit or widget tests, so most teams write fewer of them, reserved for critical user paths.
Testing Apps That Use State Management
Most real Flutter apps rely on a state management approach like Provider, Riverpod, or Bloc, and each one changes how you set up widget tests slightly.
For Provider and Riverpod, tests typically wrap the widget under test in the same provider scope the real app uses, often with mocked or overridden providers.
testWidgets('shows cart count from provider', (tester) async {
  await tester.pumpWidget(
    ProviderScope(
      overrides: [cartProvider.overrideWith((ref) => MockCartNotifier())],
      child: MyApp(),
    ),
  );
  expect(find.text('2 items'), findsOneWidget);
});
Bloc tests follow a different pattern, using the bloc_test package to assert on the sequence of states a Bloc emits in response to an event, rather than pumping a full widget tree.
Whichever state management approach your app uses, keep state setup logic in shared test helpers.
Duplicating provider or Bloc setup across dozens of test files turns into a maintenance burden as the app grows.
Accessibility Testing In Flutter
Flutter’s testing framework includes built-in support for checking accessibility properties, which often gets skipped entirely in favor of purely visual or functional checks.
Check out our complete guide for visual regression testing here →
testWidgets('meets minimum tap target size', (tester) async {
  await tester.pumpWidget(MyApp());
  final handle = tester.ensureSemantics();
  await expectLater(tester, meetsGuideline(androidTapTargetGuideline));
  handle.dispose();
});
Built-in guidelines can check tap target size, text contrast, and whether interactive elements are properly labeled for screen readers.
Running these checks alongside your regular widget tests catches accessibility regressions early, well before a manual audit or a user complaint surfaces them.
Golden tests compare a widget’s rendered output against a saved reference image, catching visual regressions that functional tests miss entirely.
testWidgets('product card matches golden file', (tester) async {
  await tester.pumpWidget(ProductCard(item: sampleItem));
  await expectLater(
    find.byType(ProductCard),
    matchesGoldenFile('goldens/product_card.png'),
  );
});
They are especially useful for design-system components, where a pixel shift might not break functionality but still breaks the visual experience.
- Catch unintended spacing, color, or font changes
- Run fast since no real device is required
- Need careful maintenance, since legitimate design changes require regenerating the reference images with
--update-goldens
Testing Native Interactions With Patrol
Patrol is an open source framework, built by LeanCode, created specifically to close the native interaction gap that integration_test cannot cover.
It lets a single test interact with both Flutter widgets and native platform UI, meaning a login flow that includes a native permission dialog or a Face ID prompt.
This is the kind of check iOS app test automation handles on the native side, can be tested end to end without switching tools mid-flow.
Patrol still depends on widget keys and finders under the hood, so selector maintenance remains a real cost even though the native interaction gap is solved.
Why flutter_driver Is Deprecated
flutter_driver was Flutter’s original integration testing tool, but it has been deprecated in favor of the integration_test package, which is included in the Flutter SDK since Flutter 2.0.
Any guide, tutorial, or Stack Overflow answer that references flutter_driver as the primary integration testing approach is describing an outdated workflow.
If your team is still maintaining flutter_driver tests, migrating to integration_test should be a near-term priority, not an eventual cleanup task.
Building A Flutter Testing Strategy That Works
Individual test types only add up to real coverage when they are structured deliberately, not scattered across the codebase without a plan.
The Flutter Testing Pyramid
A healthy Flutter test suite follows the same shape as the classic testing pyramid, just mapped onto Flutter’s specific test types.
- Many unit tests at the base, covering business logic cheaply and quickly
- A solid layer of widget tests above that, covering how individual components behave
- A smaller set of integration tests at the top, covering only the critical user journeys
Teams that invert this pyramid, writing mostly integration tests, end up with a suite that is slow to run and expensive to maintain every time the UI changes.
Common Flutter Testing Challenges
| Challenge | Why It Happens | What Helps |
|---|---|---|
| Selectors break on UI changes | Tests reference widget keys and finders directly | Self-healing tools or stable, semantic keys |
| Native elements are untestable | integration_test cannot reach outside Flutter’s runtime | Patrol, or an AI-driven platform with native support |
| Slow CI feedback | Integration tests run on real devices or emulators | Keep integration tests reserved for critical flows only |
| Flaky async tests | Animations and timing differ across devices | Use pumpAndSettle() and avoid fixed delays |
| Cross-platform inconsistencies | Rendering can differ subtly across Android and iOS | Golden tests plus real device validation |
Flutter Testing Checklist Before Release
Before shipping a release, it helps to run through a short checklist rather than relying on memory of what usually gets tested.
- Unit tests cover all critical business logic and pass in CI
- Widget tests cover every interactive component added or changed this release
- Integration tests cover login, checkout, and any other revenue-critical flow
- Native interactions like permission dialogs and push notifications have been tested manually or through Patrol
- Golden tests have been reviewed and regenerated for any intentional design changes
- At least one real device run has happened on both Android and iOS, not just emulators
- Accessibility checks have run against any new interactive screens
Treating this as a lightweight gate before release catches the gaps that individual test suites miss when reviewed in isolation.
If you are still deciding which tools cover each layer, our comparison of Flutter testing tools and frameworks ranks Patrol, Appium with Flutter Driver, Maestro, and AI-native options side by side.
Running Flutter Tests In CI/CD
Unit and widget tests are cheap enough to run on every single pull request, so most teams gate merges directly on flutter test passing.
- name: Run Flutter tests
  run: flutter test --coverage
Integration tests are more expensive, so they typically run on a schedule or before a release rather than on every commit.
Pairing them with a real device cloud avoids the gap between what passed in an emulator and what actually works on production hardware.
A practical CI setup usually looks like this.
- Unit and widget tests on every pull request, blocking merge on failure
- Integration tests on merge to main, or nightly for larger suites
- Golden tests on every pull request, since they run fast and catch visual drift early
- Full device matrix runs before a release, covering the OS and OEM combinations that matter most to your users
Choosing The Right Tools For Each Layer
No single tool covers every layer of Flutter testing well, which is why most mature teams combine two or three tools rather than forcing one tool to do everything.
Start with Flutter’s own SDK for unit and widget tests, since nothing beats the built-in flutter_test package for speed on those layers.
Layer in Patrol or an AI-driven platform for native interaction coverage, since this is exactly where integration_test runs out of reach.
Platforms like Panto AI’s Flutter test automation are built specifically to close this native interaction gap, generating tests from plain English and running them on real devices without depending purely on widget tree selectors.
Add a real device cloud once your core suite is stable, so tests validate against actual OEM devices and OS versions instead of only emulators.
If your app also ships a React Native or native module alongside Flutter screens, review React Native test automation coverage separately, since the two frameworks fail in different ways under automation.
Teams running Detox alongside Flutter in a mixed codebase should also check our breakdown of Detox alternatives, since Detox’s synchronization model does not map cleanly onto Flutter’s rendering engine.
Conclusion
Flutter app testing is not harder because the framework is poorly built, it is harder because Flutter’s rendering approach genuinely breaks the assumptions most automation tools rely on.
Understanding that tradeoff is the first step toward building a strategy that actually works.
The strongest Flutter testing setups combine the SDK’s own unit and widget testing tools, a native interaction layer like Patrol or an AI-driven platform, and real device validation, rather than expecting one tool to cover every layer alone.
FAQs
Q: What is the difference between widget tests and integration tests in Flutter?
A: Widget tests verify individual widgets or small UI components in an isolated test environment, while integration tests run the complete application on a real device or emulator. Integration tests are designed to validate end-to-end user journeys across multiple screens, services, and app components.
Q: Can Flutter tests interact with native permission dialogs?
A: Not with integration_test alone. Flutter’s testing framework primarily interacts with the Flutter application layer, while native permission dialogs are controlled by the underlying operating system. Tools such as Patrol or mobile testing platforms with native OS support can automate these interactions.
Q: Is flutter_driver still a valid way to write Flutter integration tests?
A: No. flutter_driver is deprecated. The recommended approach for Flutter integration testing is the integration_test package, which is maintained as part of the Flutter SDK and supports testing complete applications on physical devices and emulators.
Q: Why do Appium tests struggle with Flutter apps?
A: Appium relies heavily on the platform’s accessibility and native view hierarchy, while Flutter renders much of its UI through its own rendering engine. As a result, Flutter widgets may not expose the same native element structure that Appium expects, making traditional selectors less reliable without additional Flutter-specific support.
Q: How many tests should a Flutter app have?
A: There is no fixed number. A strong Flutter test strategy generally follows the testing pyramid: a large base of fast unit tests, a substantial layer of widget tests, and a smaller set of integration tests focused on critical user journeys and high-risk functionality.
Q: Should Flutter golden tests run on every pull request?
A: Yes, in most projects. Golden tests are relatively fast and can detect unintended visual changes without requiring a physical device. Running them in pull request checks helps catch UI regressions before code is merged, provided the rendering environment is kept consistent.
Q: Do Flutter tests need a real device, or is an emulator enough?
A: Emulators and simulators are sufficient for most development and CI integration testing, but real devices should be included before release. Physical devices reveal hardware-specific issues involving performance, rendering, sensors, permissions, battery usage, and OEM-specific Android behavior that may not appear in virtual environments.